The following is a list of steps in setting up HTTP Proxy to work with Mozilla Firefox Browser. You may also watch the video below as a guide:
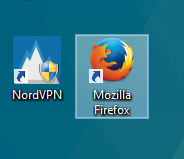
- Open the Mozilla Firefox application.
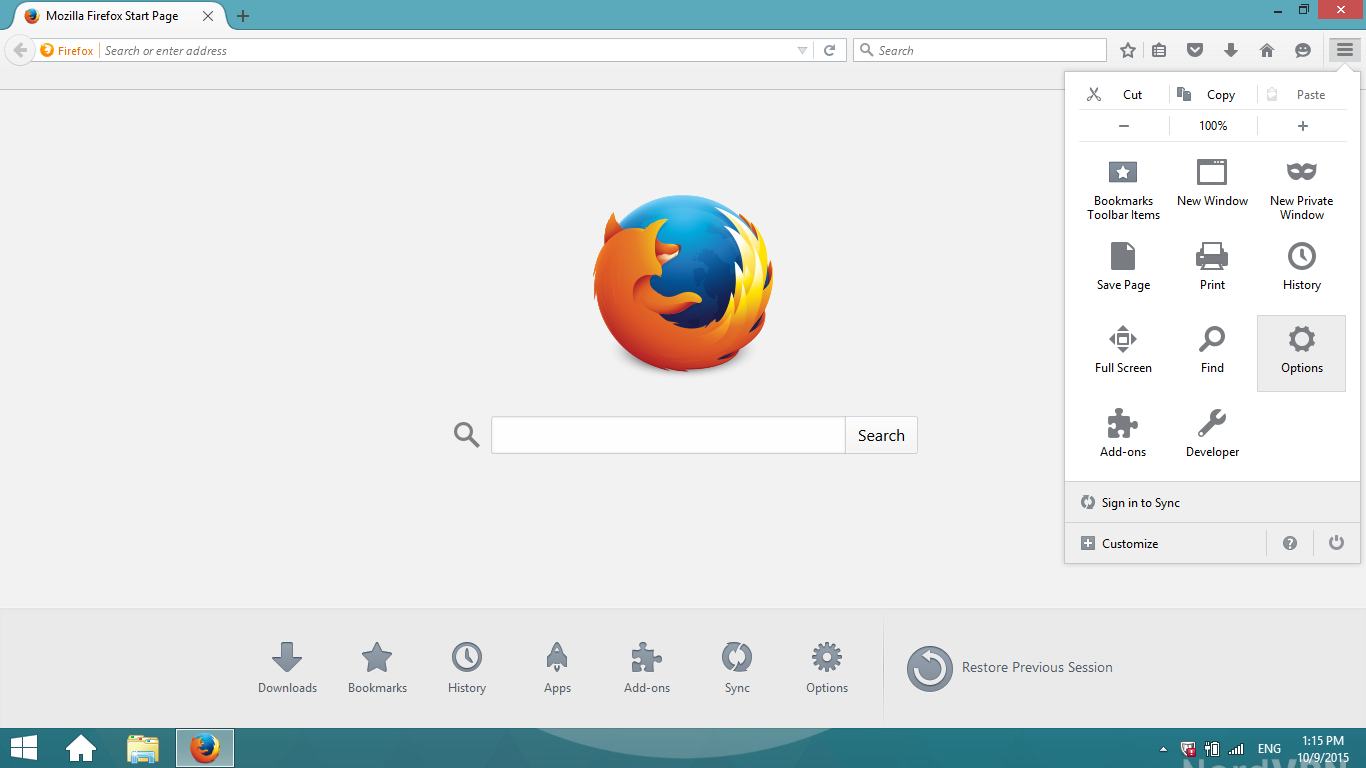
- Click on the Firefox Menu, which is located in the top-right corner of the browser window and then a drop-down menu will appear, Select Options.
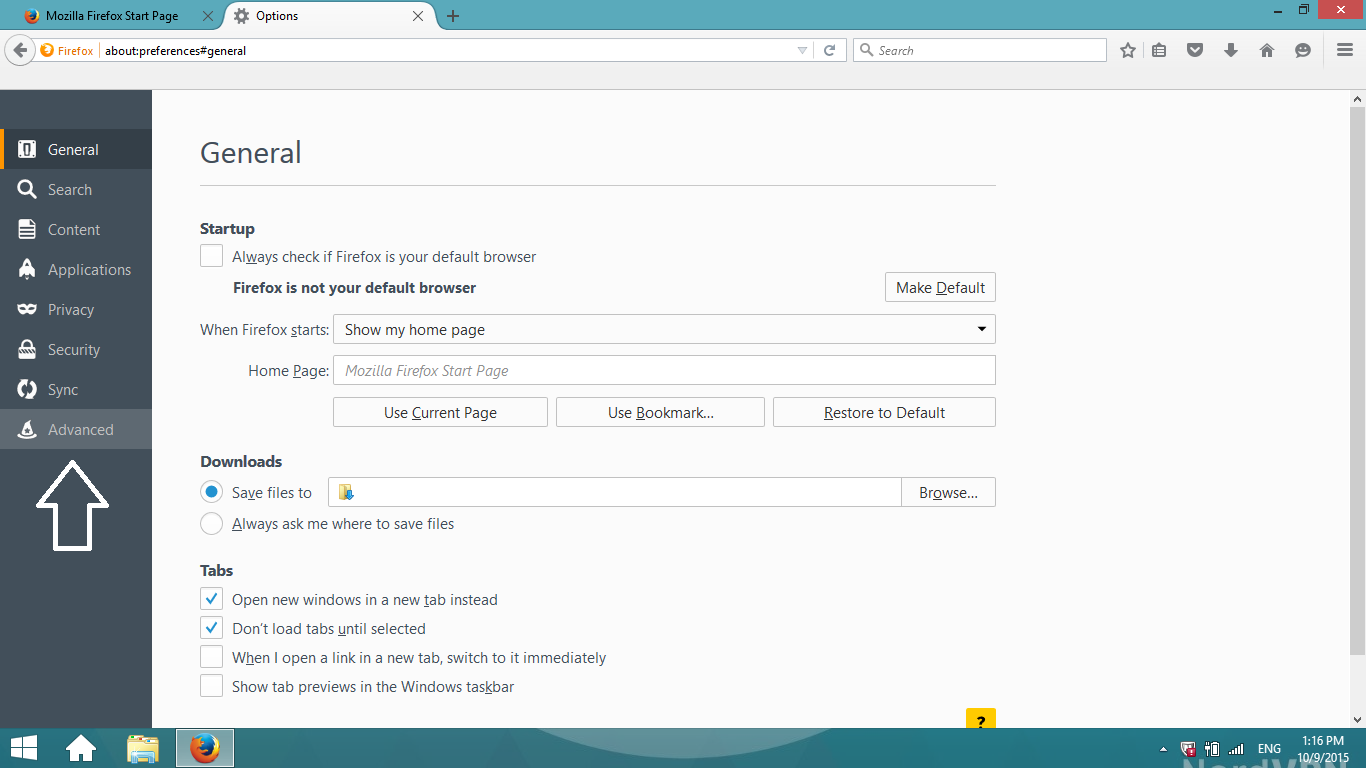
- The Options window will open. From the side menu, Click on Advanced which is found at the bottom of the menu list. You will be directed to the Advanced Page.
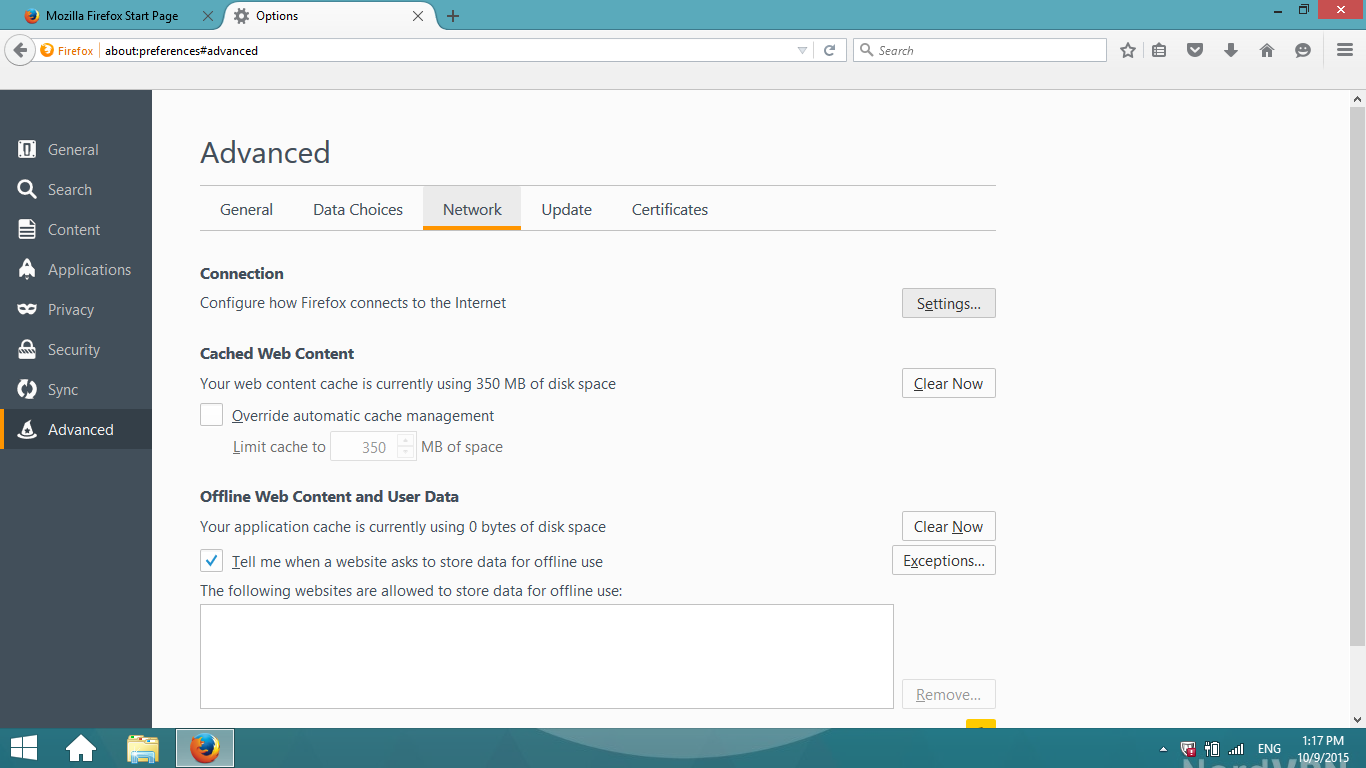
- From the Advanced page, select Network tab and click on the Settings button.
- A new window will pop up and from that window, select the Manual proxy configuration.
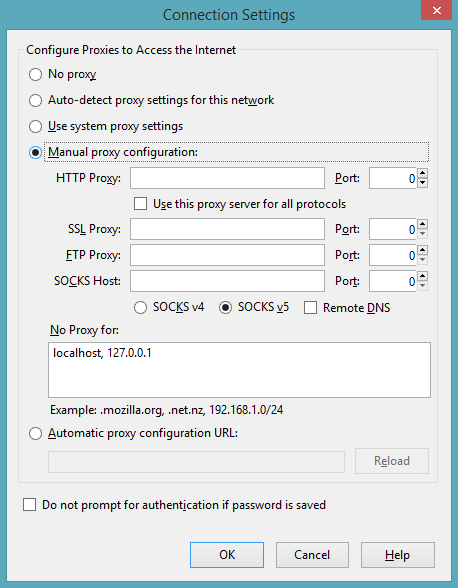
- In the HTTP proxy field, you may enter one of NordVPN’s servers addresses. You can choose any server you like from this list: NordVPN Server List.
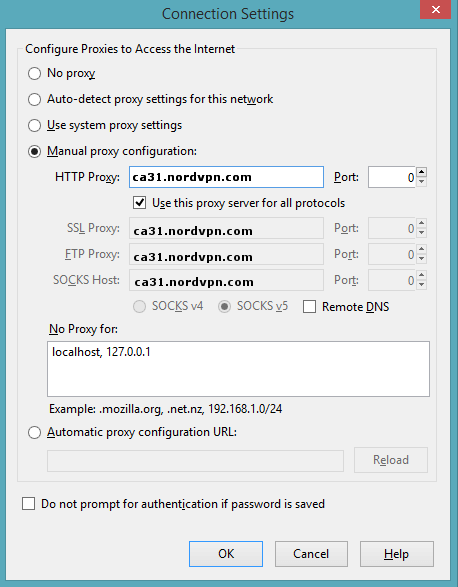
- Tick the checkbox – Use this proxy server for all protocols.
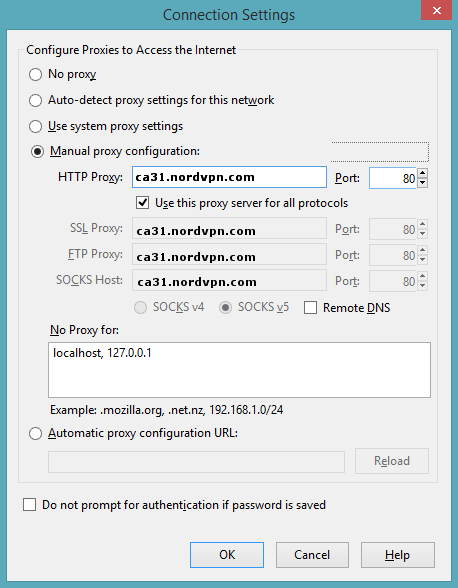
- In the Port field, Enter 80.
- If you tick the checkbox – Do not prompt for authentication if the password is saved, the credentials for proxies will be automatically saved and you will not be asked for authentication gain unless it fails.
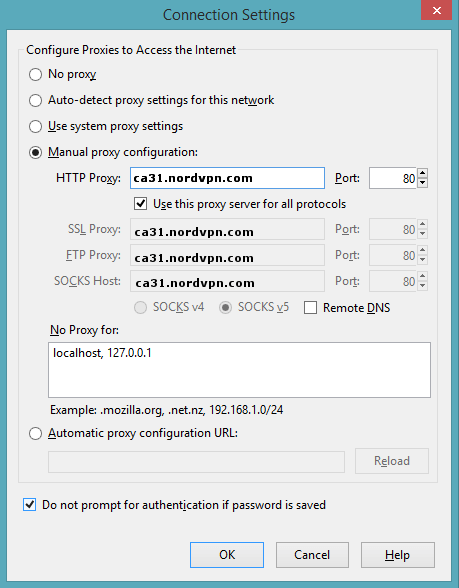
- Click Ok to exit the Connection Settings window.
- To test your proxy configuration, try accessing a site. You will then be prompted for your username and password. Enter your NordVPN Username and corresponding password. Click Ok.
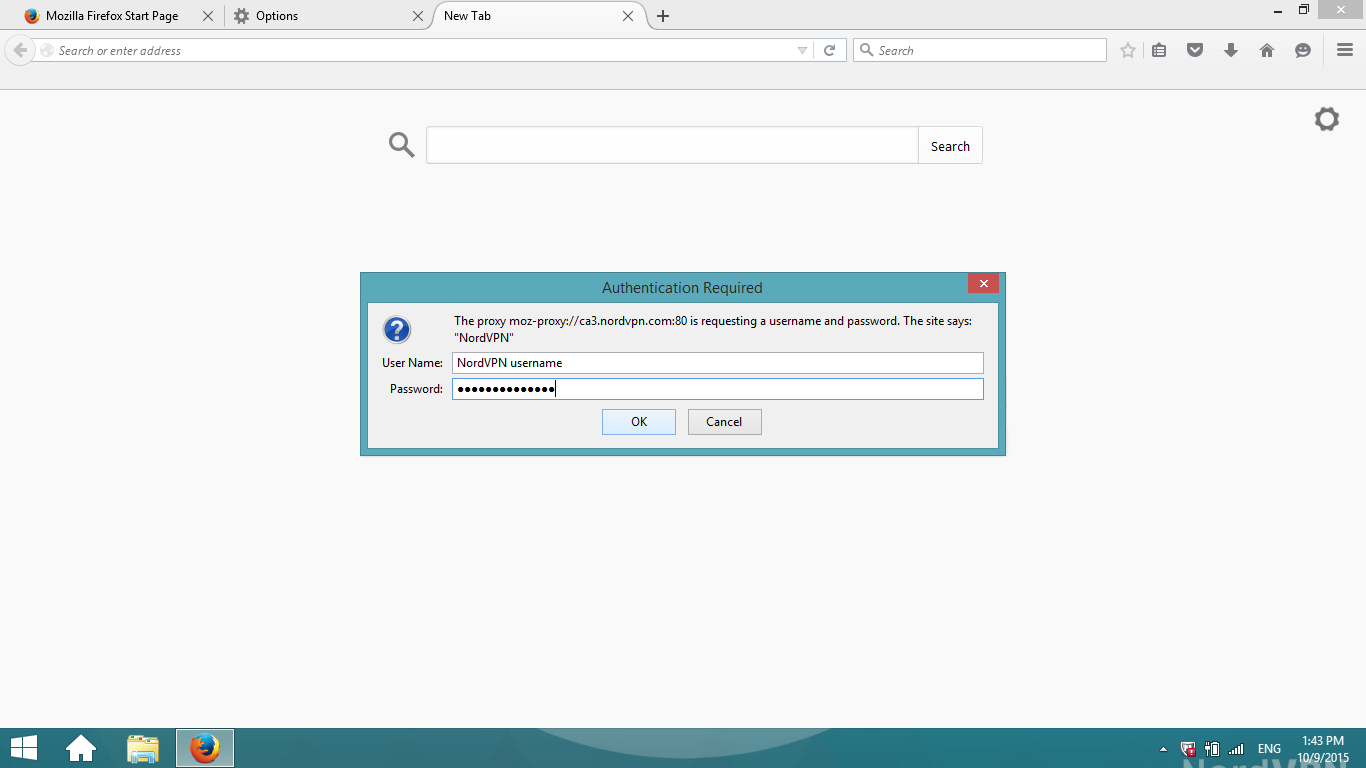
If you are able to access the site without any problems, then your Mozilla Firefox configuration is done.
If you want to check whether HTTP proxy really works, go to What is my IP address website and from there you will see the IP Address of your chosen server.


